Set Up Your Watercoolr in Five Simple Steps
Watercoolr is your 24/7 secure virtual lounge where everyone in your organization can congregate whenever they wish to take a break.
Your Watercoolr has already been created for you and is ready to be customized and optimized to your specific needs.
STEP 1:
Set Title/Subtitle/Password
- Your Watercoolr will already have a Title and Subtitle, but feel free to change them
- PRO TIP: get creative with your Subtitle and change as needed to emphasize different get-togethers: “Weekday Coffee Breaks 10:15 – 10:30”
- Watercoolrs are open to all by default, but if you want to restrict a particular get-together, set up a Password or Guest List in the Alternative Login Requirements section of the Customize Watercoolr page
STEP 2:
Customize Attendee Nametags
- By default only attendee names are displayed to others, so if that is all you require, you don’t have to do anything – skip to Step 3!
- If you want any additional information displayed, click + Add Field
- Type in whatever criteria you want, and set it to optional or required to enter. Some ideas: Title; Location; Department; Ask Me About…; Theme Song, etc.
- Note: you can create multiple additional fields, but only two can be displayed in attendees’ Nametags at a time, as selected with the “Display in Nametag” checkboxes
STEP 3:
Set Banner/Logo/Description
- Default Watercoolr banner and logo display on your Splash Page when invitees sign in to enter. These can be removed if desired, by clicking the “X” on either or both
- Or you can upload your own banner and/or logo by clicking the “Replace Banner” button on either or both
- Add a description for your Watercoolr by clicking on the text field in the description box. Feel free to add links, images, and even embedded videos
- The description might be used to notate regular convenings you wish to encourage: i.e. Coffee Breaks daily at 10:00; Departmental Lunches Tues. & Thurs. at 12:30; Afternoon Sales Get-Together at 3:00; After-Work Happy Hour Fridays at 6 PM
STEP 4:
Customize Background Image
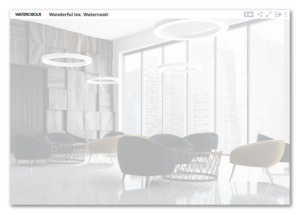
- By default your Watercoolr will display this background image:

- If you wish to replace it, simply click “Replace Background” and navigate to a new image (recommended size: 1920px x 1080px).
STEP 5:
Set Optional Welcome/Resource Display
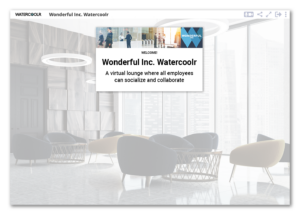
Attendees will see a Welcome Slide by default, displayed centered toward the top of the screen, as shown here:

- This text can be edited by clicking Custom Welcome and adding a new header/subheader. Some ideas: Thought of the Day/Example; New Hire/Employee Name; Friday Survey/Question
- Instead of text, you can use this feature to display an image or slideshow by clicking Upload Asset and navigating to a jpg, gif, png, or pdf file. Attendees can click through slideshows at their own pace.
- To display a video instead, click Embed HTML and enter the video’s embed code. Videos do not autoplay; attendees can start and stop them as they wish.
- This feature can be turned off entirely by clicking Welcome Slide Off
Click “Done” and your changes will be saved and your Watercoolr will be ready for your team members to congregate!

This simple set-up is perfect for:
- Departmental Coffee Break
- Communal Lunch
- After Work Happy Hour
- Earlybird Breakfast Meetup
- New Employee Welcome Lounge
- Brainstorming Session
- Leadership Meet & Greet
It’s all about letting your team members know how and when to step away from the routine and into their Watercoolr.
Additional Resources:
Need help letting your team know about your new Watercoolr? Read our sample email: Introducing Watercoolr to Your Organization.
Find simple creative ideas for setting up various types of Watercoolr Events here: Top Ideas for Watercoolr Gatherings.
When you’re ready to utilize Watercoolr’s more advanced features and customize even further: Advanced Tips for Your Watercoolr.
Please reach out to us at info@shindig.com if you have any questions.


